Choosing the Right Kit for Wildlife Photography Canon 5D MkIII and Olympus OMD EM5
Choosing the right kit for nature photography often causes confusion. But these days you really don’t need to spend the earth in order to put together a competent system. There are currently a number of very interesting discussions taking place within the photography community about the increasing numbers of established professional photographers who are turning to small mirrorless systems. There is no doubt that some excellent CS cameras have hit the headlines this year, their features and performance being so good that they can easily stand in for a DSLR on many photography assignments.
The main reason that professionals are turning to smaller systems relates to our health and comfort, many photographers have injuries or persistent pain from carrying heavy equipment for hours at a time, often over a period of many years and this can make our job miserable. This is by far the main reason why the new systems have been welcomed by professionals and keen amateurs alike. My own occupational injuries are such that compact systems will enable me to carry on doing my job, and to take more demanding jobs than I might otherwise consider.
Full Frame Canon 5DMkIII vs Micro Four Thirds Olympus EM-5 Field Comparison
So what’s the point of today’s post? Well, there is invariably some resistance amongst the less experienced camera uses (and perhaps some members of the public) to the viability of small camera systems. I will point out that I remember the days when 35mm cameras were about the same size (or a little smaller) as the compact systems I am talking about. And do remember this – a camera is simply a recording device. There is unlikely to be a worthwhile or saleable image without the photographer’s technical expertise, ability to understand light, composition, framing, narrative, colour, depth of field, exposure and of course post-processing. Providing your camera is suited to the task you have planned for it (for example you’ll need good ISO capability if you plan to shoot in very low light levels, and you’ll need fast and accurate autofocus if you have to work quickly or if you need to photograph moving subjects, etc) then that’s all that matters. The size of your camera is usually irrelevant in this respect.
Professional and mid-range DSLR cameras have generally grown larger over the years and some consumers are likely to feel that bigger looks better. Yes, I said it. I often come across guys strung with great big cameras and lenses who take very few photographs but who seem to enjoy the fact that passers-by may think they’re professional photographers (and as a pro myself, that’s the last thing I would want)! An established and competent professional usually only cares about getting the job done well. With that in mind yesterday’s photography involved an informal outing with an amateur photographer who enjoys photographing nature and wildlife within the many animal parks and sanctuaries he visits. He owns a very nice DSLR camera and a couple of perfectly good lenses, but he admits to finding them rather heavy and inconvenient when he’s trying to enjoy a day out. This proved to be the perfect opportunity for me to take my recently acquired Olympus OMD EM-5 into the field, and demonstrate the capabilities of the camera alongside the current king of DSLRs – the fabulous Canon 5D MkIII.
Most of you will understand that to get the best out of your camera you need good lenses. Lenses make a huge difference to the detail, colour and contrast that we’re able to record. Hence the 5D MkIII was kitted out with the superb Canon 70-300 f4-f5.6L, which is wonderful for near wildlife and portraiture. My little OMD wore a cheap but excellent 40-150 f4-f5.6 zoom. Some of you will be holding your hands up in horror at the mere thought of expecting such an inexpensive Micro 4/3 lens to compete with one of Canon’s best. But you might be very surprised if you saw what this little lens is capable of. It’s what we call a hidden gem, and its performance is outstanding in pretty much every way and I would not hesitate to use this lens on professional assignments. It is of course made of plastic and doesn’t have weather sealing, but that’s what makes it nice and lightweight and such a pleasure to use.
The aim of this photography session was to show my companion the similarities and differences between two different systems – one system costing several thousand pounds and one system costing a little over one thousand. In reality both cameras are so different that they can’t be compared. But it did prove to be a very good way of making some important points. This is not one of those “one camera is better than the other” discussions nor am I interested in datasheets and charts – I assess my kit by using it under the conditions in which I might normally find myself. I will also say that my 5D MkIII cameras are pretty much the finest performers on the planet at the time of writing this, and until recently I couldn’t have done my job or run my business without them. But there are more and more occasions when I don’t need them and a high performing mirrorless system will be a better choice based on subject matter and more importantly the duration with which I expect to have to carry my camera bag.
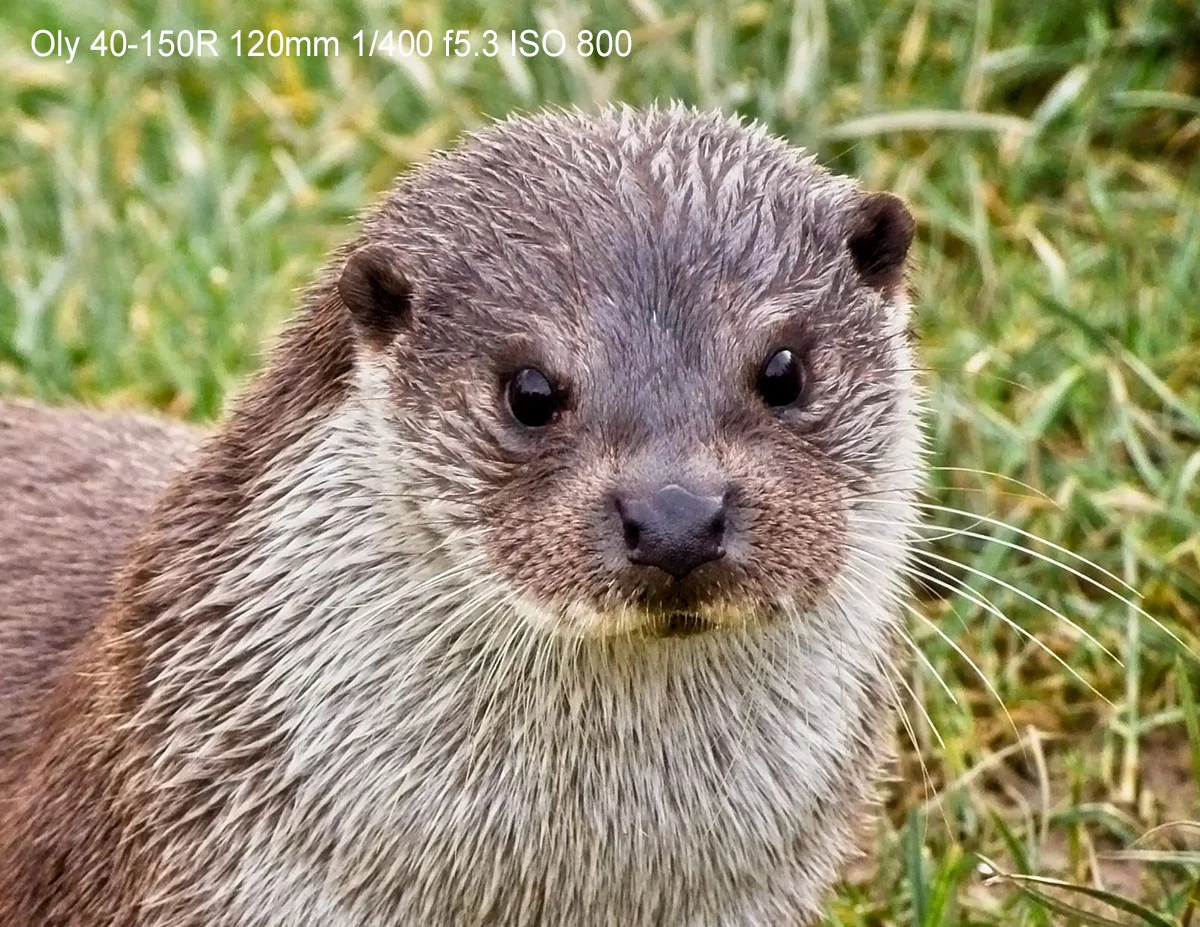
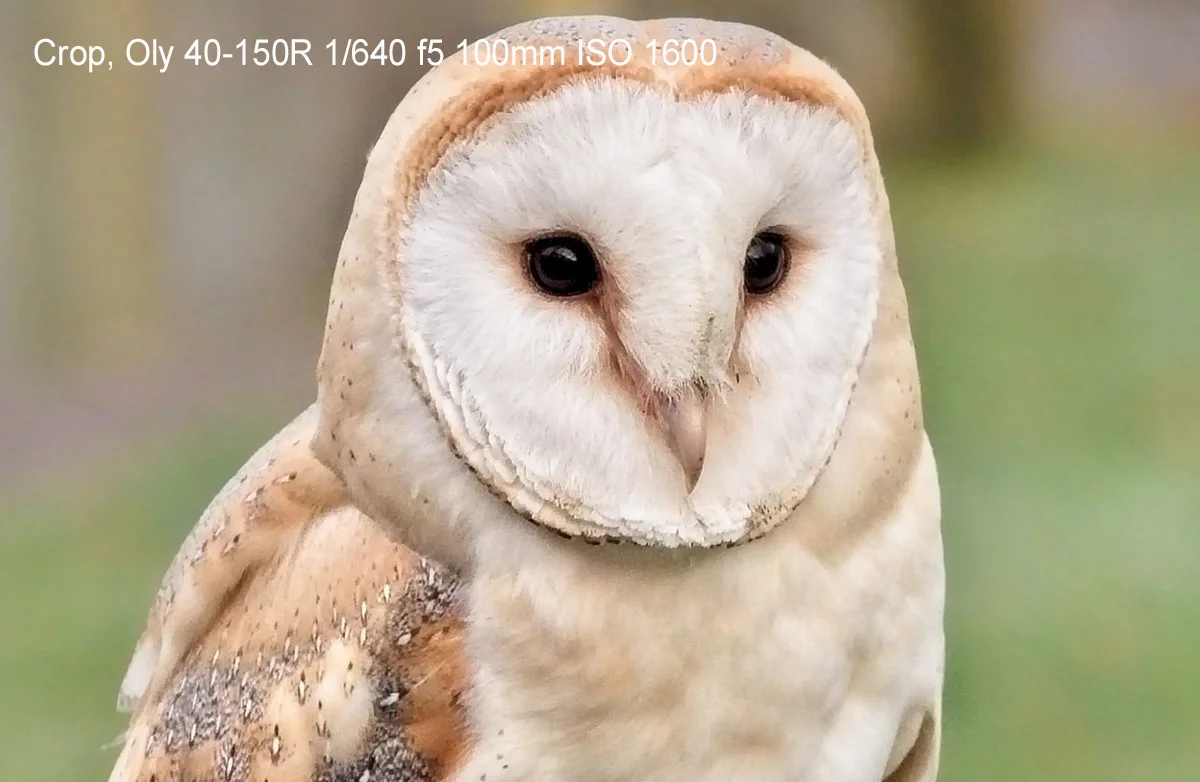
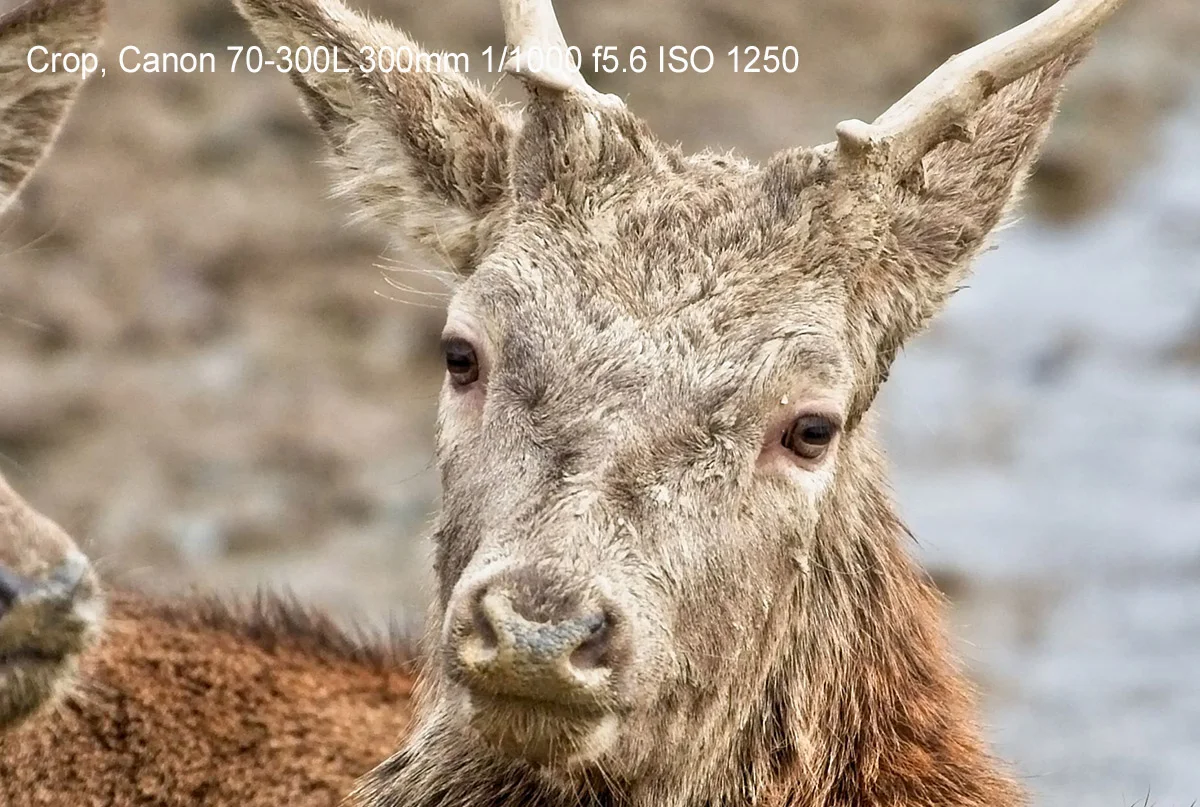
In order to highlight the differences I kept the settings on both cameras broadly the same, shooting RAW with a fixed daytime white balance, and maintaining the same aperture within the same scenes. The images were then converted to JPEG using Adobe Lightroom 4.3 and were corrected for contrast and (if necessary) colour balance. A small amount of default sharpening was applied. I’ll say a bit more about postprocessing after the pictures. Incidentally wildlife photography in the UK normally equals high ISO values. There is no getting away from that throughout most of the year. It’s not ideal for equipment testing, but since we’re doing a comparison it isn’t such a big issue. And it does show how well the little OMD holds up against the mightly Canon 5D Mkiii and the stunning Canon 70-300L.
Olympus OMD EM-5 Images:
Today’s Tip:
If you’re forced into high ISO values it’s best to avoid lifting the shadows during post production. If you do, noise will become significantly more visible in parts of your image. Avoid too much sharpening as well. Get your exposure right at the time of capture so you’re doing as little as possible to the picture afterwards.
Canon 5D Mkiii Images:
Conclusions:
So what have we learnt from all of this? I think it’s quite clear from the photographs that the little Olympus is a fantastic performer and the cheap zoom lens I chose has proved to be impressive in the field. These are not scientific tests, what matters to me is how a system performs in real-life situations. So you may be thinking, why don’t I just get rid of my pro DSLR kit? Quite simply because, depending on what you photograph, a highly specc’d DSLR is currently still the best tool for some jobs – continuous autofocus being an example of where it will excel. So far, compact systems cannot compete on accurate continuous autofocus though this may well change given the speed with which developments are being made. But for most of my assignments I will say at this point that I will be quite happy to use my OMD and I am not the only professional who feels that way, judging by the e-mails I receive and the discussions I see within the photographic community.
EDIT: it’s now May 2014 and in fact I have been using my Micro 4/3 equipment for at least 95% of my work – much more than I expected, and very much a testament to their performance – time to start offloading our DSLR inventory.
Occasionally the matter of depth of field crops up, because Micro 4/3 cameras have just under two stops of additional (apparent) DOF when compared to a full frame DSLR. Some photographers are concerned this might be a limitation, but it need not be at all, if you can invest in some of the fabulous fast prime lenses which are now available for Micro 4/3 cameras. And in fact the increased DOF is a real bonus at times. You can immediately see the shallower DOF in the Canon images above at the same aperture. In order to get the desired DOF (along the lines of what you see with the Olympus) I would have needed to stop down the 5D MkIII, and in order to maintain the necessary shutter speed I would then have needed to increase my ISO. Bumping the ISO on a 5D MkIII is nothing to worry about, but that might not be the case on other DSLR systems.
I spent the day carrying my OMD and my learner photographer was very helpful and carried the Canon kit, simply handing it to me whenever I wanted to take a picture. On the way home, after around five hours of being on our feet, he was complaining about pains in his shoulders, neck, and back. Once home, he immediately craved an arnica bath and a brandy, whilst I still had lots of energy. And that is where I rest my argument. As for the photos, we zoomed in to both sets of pictures and we could not readily see differences in detail and sharpness, which is pretty amazing. No wonder the OMD is one of the most talked about inventions of the year. Naturally the OMD will show more noise at higher ISO readings, that’s to be expected and all RAW files will show more noise than a JPEG (the OMD appears to show less noise than my APS-C DSLR bodies). In terms of white balance the Olympus was incredibly accurate and didn’t require correction. The Canon came up a little greenish when the light was flatter and more overcast, but otherwise they were fairly similar. ISOs of both cameras ranged from 800 to 2000 – the Canon exhibiting a higher ISO reading (by around half a stop) at the same aperture and shutter settings.
Finally, a word about post-processing. I receive quite a lot of e-mails from new photographers who are concerned about the pictures they’re producing – almost always the camera is blamed. Put simply, processing is a vital part of your photography workflow. After all, if you prepare a beautiful salad it would be a little odd if you served it without a nice dressing to enhance it. All images require some processing, whether they’re JPEGs or RAW files. JPEGs can be controlled to an extent in camera by setting up your picture style parameters such as contrast, colour etc. A RAW file will appear flatter by comparison and will need a little more tweaking to get the best out of it – it’s usually worth it since RAW files are more maleable than JPEGs and will better withstand correction to exposure and colour temperature. Bear in mind that in the days when we all had no option but to shoot film, your lab (be it a professional lab or the lab managed by your local drugstore) would normally apply corrections automatically, and this remains a normal part of photographic workflow into the digital era. But it does mean that photographers need to learn about processing and if you want to produce high quality photographs the learning curve can be a long one, often as long as learning photography itself.
The Micro Four Thirds vs Full Frame Debate
If this is a subject which interests you there’s further reading over on my main portrait website. There I’ve compared the two formats in real world situations whilst expanding on the often groundless arguments put forward by those who resist anything other than FX equipment.
Micro Four Thirds vs Full Frame for Professional Photography


